
In order to configure your email account on your Android device, please perform the following steps:
Locate your Email application.
Step 1: Go to “Apps“.
Step 2: Go to “Email”.
Step 3: Click on the “Menu” button.
Step 4: Go to “Settings“.
Step 5: Click on “+“.
Step 6: Enter your full email address and password for the email account. The description field can be filled in as you see fit.
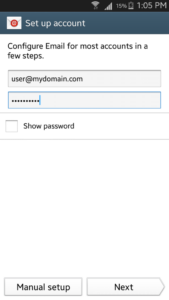
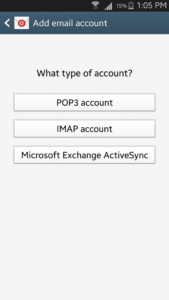
Step7: Click Manual setup and select the type of protocol (POP3 or IMAP)
The following steps will guide you through the process of POP3 account set up:
You will need to indicate the following fields:
Step 8: Enter in our mail server information. For POP/IMAP server enter mail.yourdomain.com and for username enter your full email address. Example “[email protected]”. If the password field is not filled in, re-enter it again. Select Port 110 for inbound POP3 port. Select Port 143 for inbound IMAP.

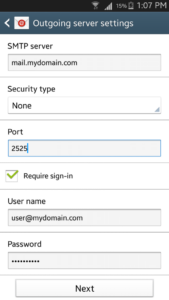
Step 9: Enter in our mail server information. For the host SMTP server enter mail.yourdomain.com and for username enter your full email address. Example “[email protected]”. If the password field is not filled in, re-enter it again. Select Port 25 or 2525 with security type none for outbound server.
Please note that Require sign-in option must be checked
Click on Next
Step 10: You will be able to indicate the following settings: Inbox checking frequency, whether to set up this email account as default or not, notifications when email arrives, sync of emails for this account, whether to download attached files when connected to Wi-Fi or not
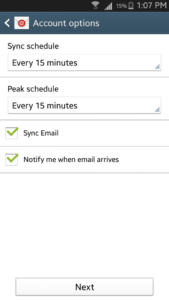
Click on Next
You may assign a name to your email account type the name of account and click on Next
That’s it.
We hope that this process was easy for you. If you still require any assistance from us, feel free to contact us via live chat Live Chat or Ticket System.
Please attach screenshots of the errors you receive to speed up the process of issue resolution.